Access node
If you’re a new Web3 developer, it’s unlikely that you’ll need to run your own full node on Polygon.
The majority of developers use a node provider, or a third-party external service that receives node requests and returns responses for you automatically. That’s because the fastest way to get developing on Polygon is using a node provider rather than managing your own node.
Tip
New developers on the Polygon network can use Alchemy as their node provider because of its reliability, scalability, and Enhanced APIs.
Send your first blockchain request
This guide assumes you already have an Alchemy account and access to the Alchemy Dashboard.
Create an Alchemy Key
First, you’ll need an Alchemy API key to authenticate your requests. You can create API keys from the dashboard. Check out this YouTube video on how to create an app. Or you can follow the steps written below:
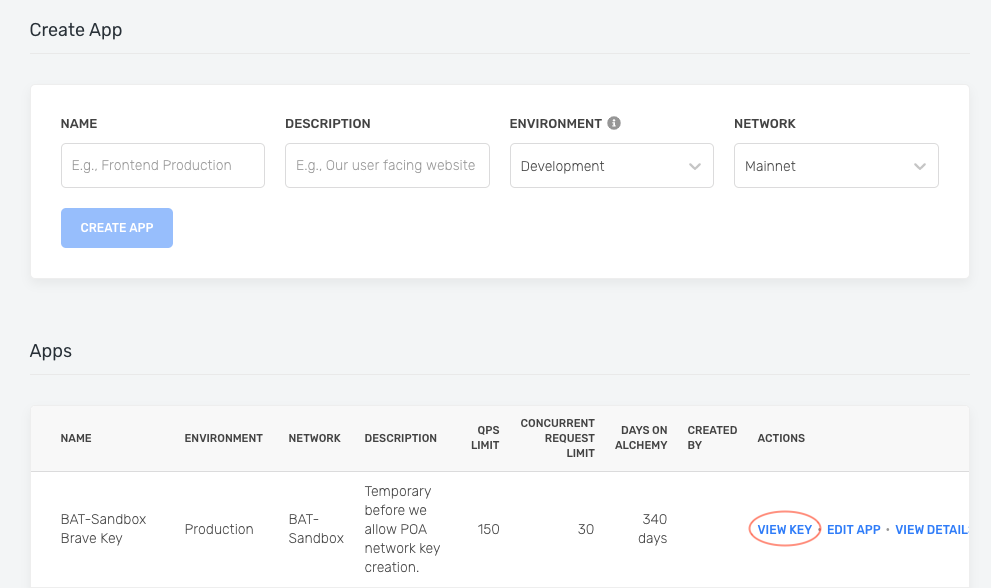
Step 1 → Navigate to the Create App button in the Apps tab.

Step 2 → Fill in the details under Create App to get your new key. You can also see the applications you previously made by you and your team on this page. Pull existing keys by clicking on View Key for any app.

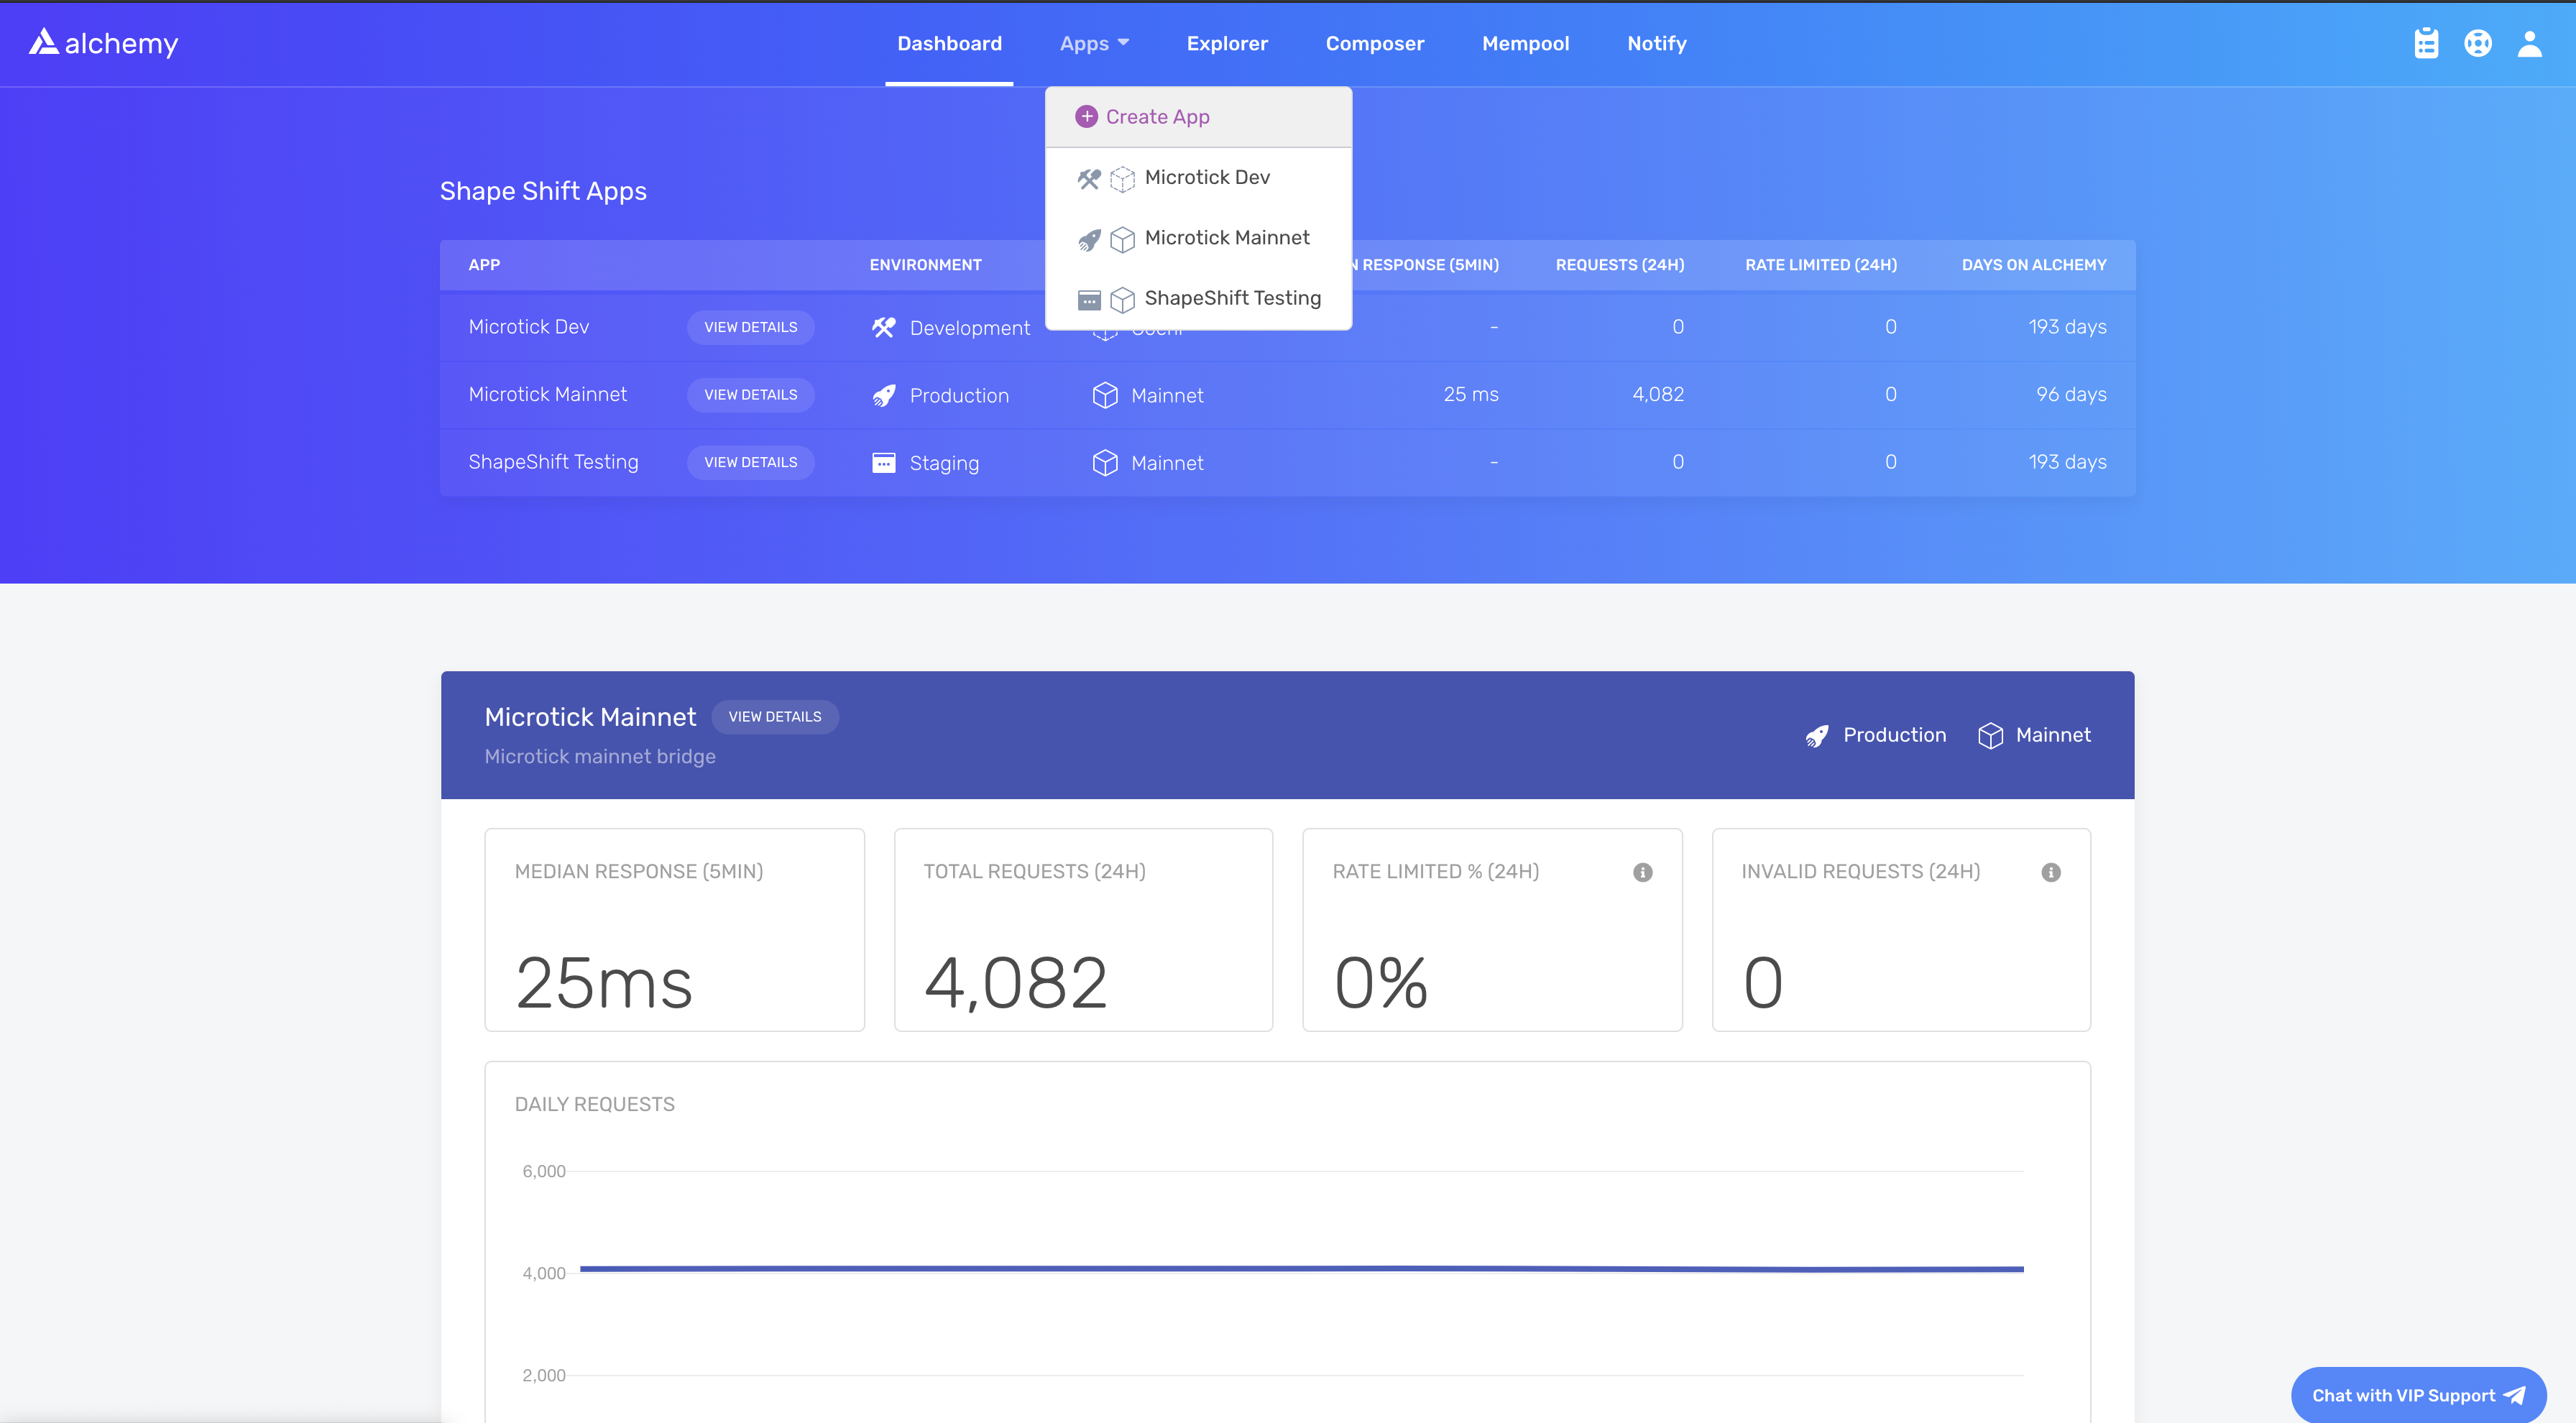
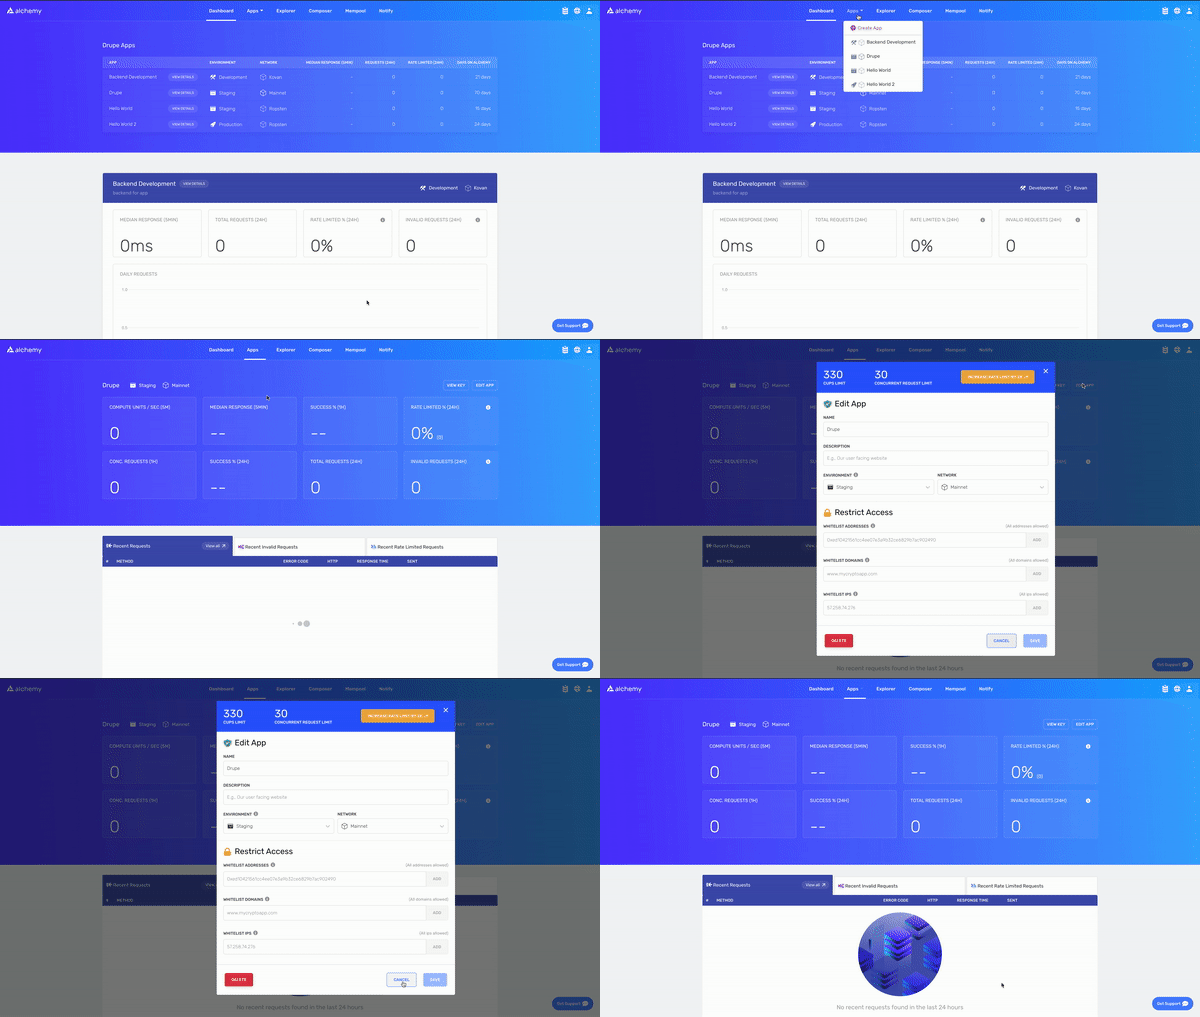
Optional → You can also pull existing API keys by hovering over Apps and selecting one. You can View Key here, as well as Edit App to whitelist specific domains, see several developer tools, and view analytics.

Making a cURL request
You can interact with Alchemy’s Polygon infrastructure provider using JSON-RPC and your command line interface.
For manual requests, we recommend interacting with the JSON-RPC via POST requests. Simply pass in the Content-Type: application/json header and your query as the POST body with the following fields:
jsonrpc: The JSON-RPC version—currently, only2.0is supported.method: The MATIC API method. See API reference.params: A list of parameters to pass to the method.id: The ID of your request. Will be returned by the response so you can keep track of which request a response belongs to.
Here is an example you can run from the Terminal/Windows/LINUX command line to retrieve the current gas price:
curl https://matic-mainnet.alchemyapi.io/v2/demo \
-X POST \
-H "Content-Type: application/json" \
-d '{"jsonrpc":"2.0","method":"eth_gasPrice","params":[],"id":73}'
Info
In case you want to send requests to your own app instead of our public demo, replace https://eth-mainnet.alchemyapi.io/jsonrpc/demo with your own API key https://eth-mainnet.alchemyapi.io/v2/your-api-key.
Results:
{ "id": 73,
  "jsonrpc": "2.0",
  "result": "0x09184e72a000" // 10000000000000 }
Alchemy SDK setup
To make blockchain requests directly from your Javascript / Node.js dApp, you’ll need to integrate the Alchemy SDK, the easiest and most powerful way to access the blockchain and Alchemy’s suite of enhanced APIs.
If you have an existing client such as Web3.js or Ethers.js, you can just change your current node provider URL to an Alchemy URL with your API key: https://eth-mainnet.alchemyapi.io/v2/your-api-key
Note
The scripts below need to be run in a node context or saved in a file, not run from the command line.
Install the Alchemy SDK
To install the Alchemy SDK, you want to create a project, and then navigate to your project directory to run the installation. Let’s go ahead and do that! Once we’re in our home directory, let’s execute the following:
With Yarn:
mkdir your-project-name
cd your-project-name
yarn init # (or yarn init --yes)
yarn add alchemy-sdk
With NPM:
mkdir your-project-name
cd your-project-name
npm init   # (or npm init --yes)
npm install alchemy-sdk
Create index.js
Make sure to replace demo with your Alchemy HTTP API key!
// Setup: npm install alchemy-sdk
const { Network, Alchemy } = require("alchemy-sdk");

// Optional Config object, but defaults to demo api-key and eth-mainnet.
const settings = {
  apiKey: "demo", // Replace with your Alchemy API Key.
  network: Network.MATIC_MAINNET, // Replace with your network.
};

const alchemy = new Alchemy(settings);

async function main() {
  const latestBlock = await alchemy.core.getBlockNumber();
  console.log("The latest block number is", latestBlock);
}

main();
If you are unfamiliar with the async stuff, check out this Medium post.
Run index.js using node.js
node index.js
Console output
You should now see the latest block number output in your console.
The latest block number is 11043912
Excellent! You just wrote a working Web3 script and sent your first request to your Alchemy API endpoint.
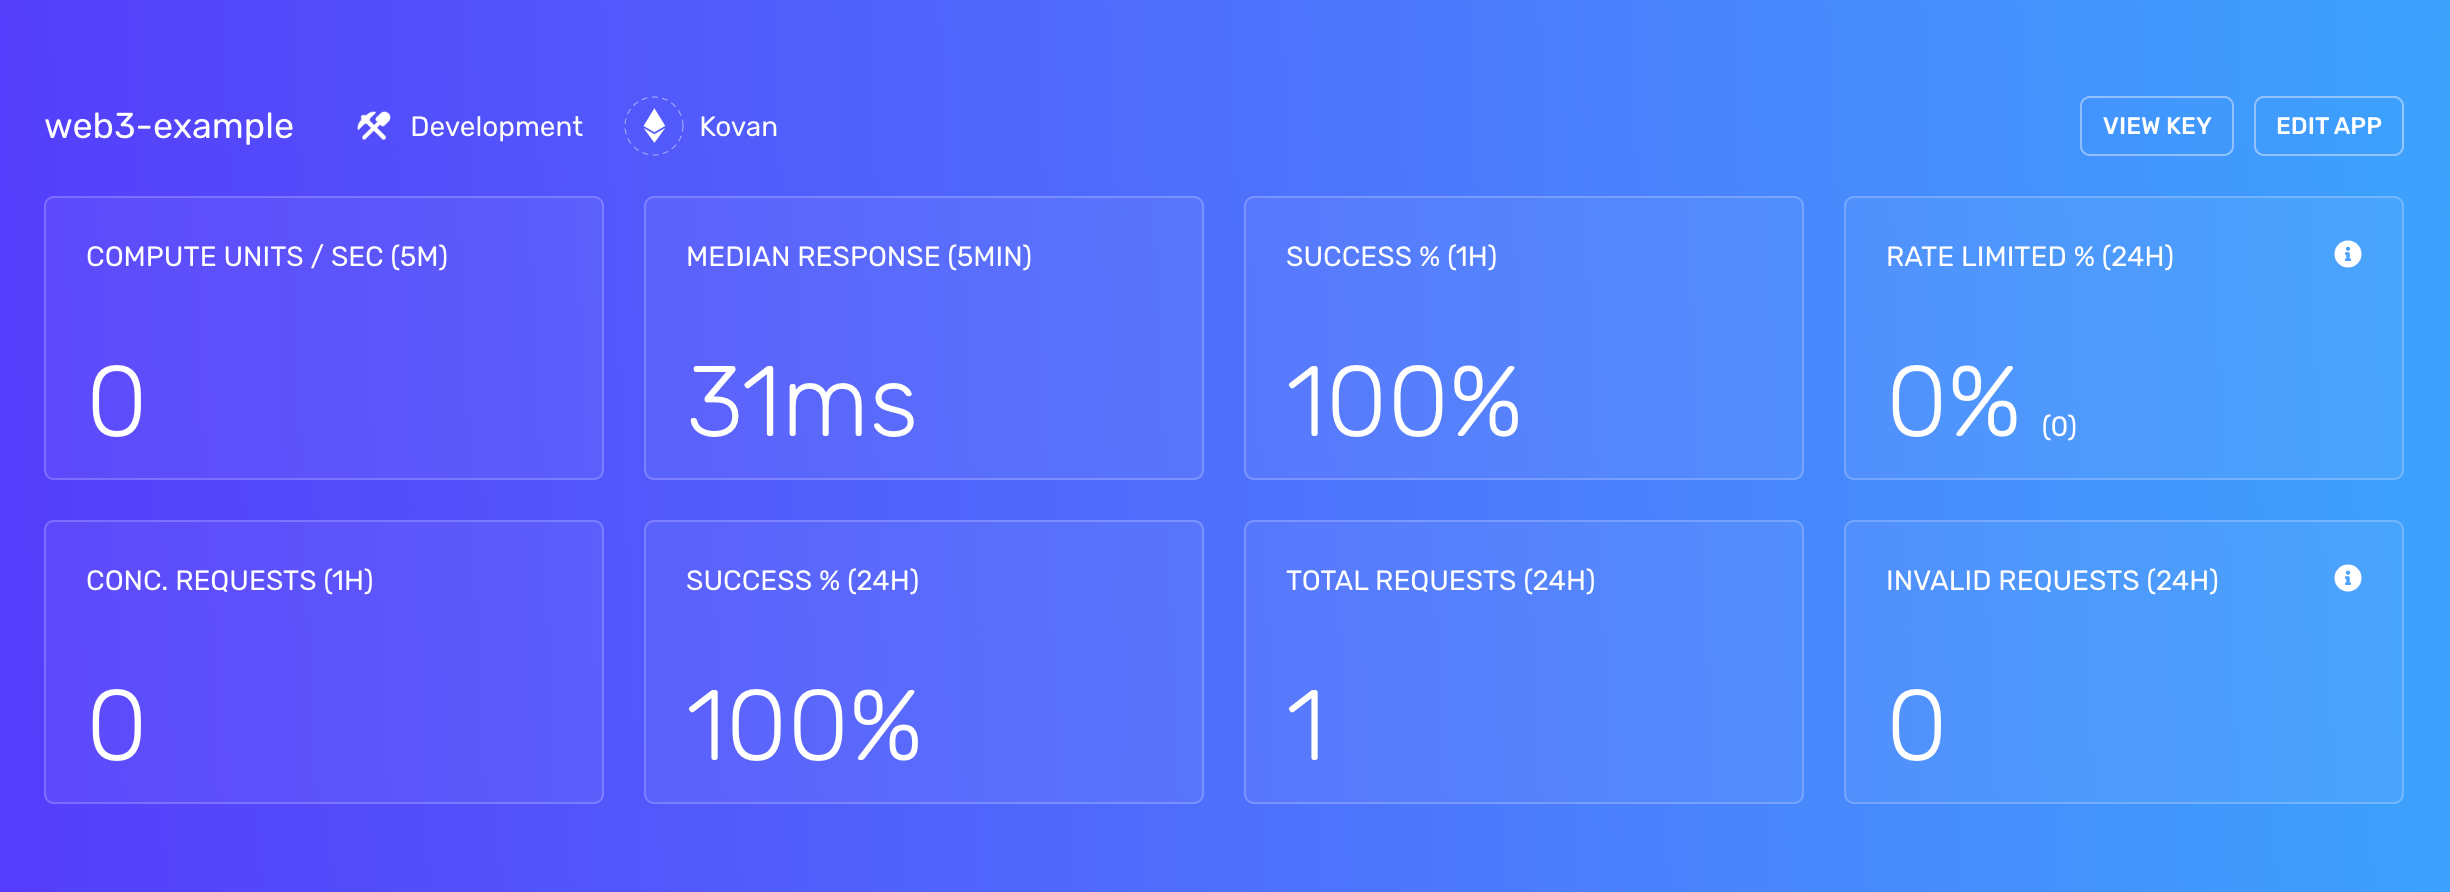
The project associated with your API key should now look like this on the dashboard:


Start building
Don’t know where to start? Check out these tutorials to get more familiar with Alchemy and blockchain development:
- Examples of Common Queries Using the Alchemy SDK
- Learn How to Send Transactions on Ethereum
- Try deploying your first Hello World Smart Contract and get your hands dirty with some solidity programming!
Other Web3 libraries
There are a number of alternative Web3 libraries other than the Alchemy SDK you may already be using. See the documentation for these libraries below:
Using the below code snippets, you can install and use Alchemy as a provider via any of the following libraries.
# Setup: pip install web3
from web3 import Web3
alchemy = Web3(Web3.HTTPProvider("https://eth-mainnet.alchemyapi.io/v2/your-api-key"));
// Setup: curl -L get.web3j.io | sh
Web3j web3 = Web3j.build(new HttpService("https://eth-mainnet.alchemyapi.io/v2/your-api-key"));
// Setup: npm install ethers
const ethers = require("ethers");
const url = "https://eth-mainnet.alchemyapi.io/v2/your-api-key";
const customHttpProvider = new ethers.providers.JsonRpcProvider(url);
// Setup: npm install web3
const Web3 = require('web3');
const web3 = new Web3("https://eth-mainnet.alchemyapi.io/v2/your-api-key");